🎬 Lesson 1.2: States & Transitions
In Lesson 1.1 you met the pieces: clips, the Animator component, and an Animator Controller. Now we wire them together into a state machine — the flowchart that decides which animation plays and when it switches. This is the heart of character animation in Unity.
🎯 Learning Objectives
By the end of this lesson, you will be able to:
- Explain what an animation state is and read an Animator state machine
- Create states from clips and set the default (entry) state
- Connect states with transitions and control them with conditions
- Use parameters (Float, Bool, Trigger) as the switches your game code flips
- Understand Has Exit Time vs. condition-driven transitions
Estimated Time: 45 minutes · Prerequisite: Lesson 1.1 (Clips, Animator & Controllers)
In This Lesson
A State Is a Pose in Motion
A state is simply "the animation the character is doing right now." A character standing still is in its Idle state; start moving and it switches to a Run state; press the jump button and it enters a Jump state. Each state plays one motion (a clip or a blend of clips), and the Animator's job is to move between them at the right moments.
Here's the exact same character — Timmy, our rigged robot — sitting in three different states. These are real renders from Unity, each captured while its state was active:
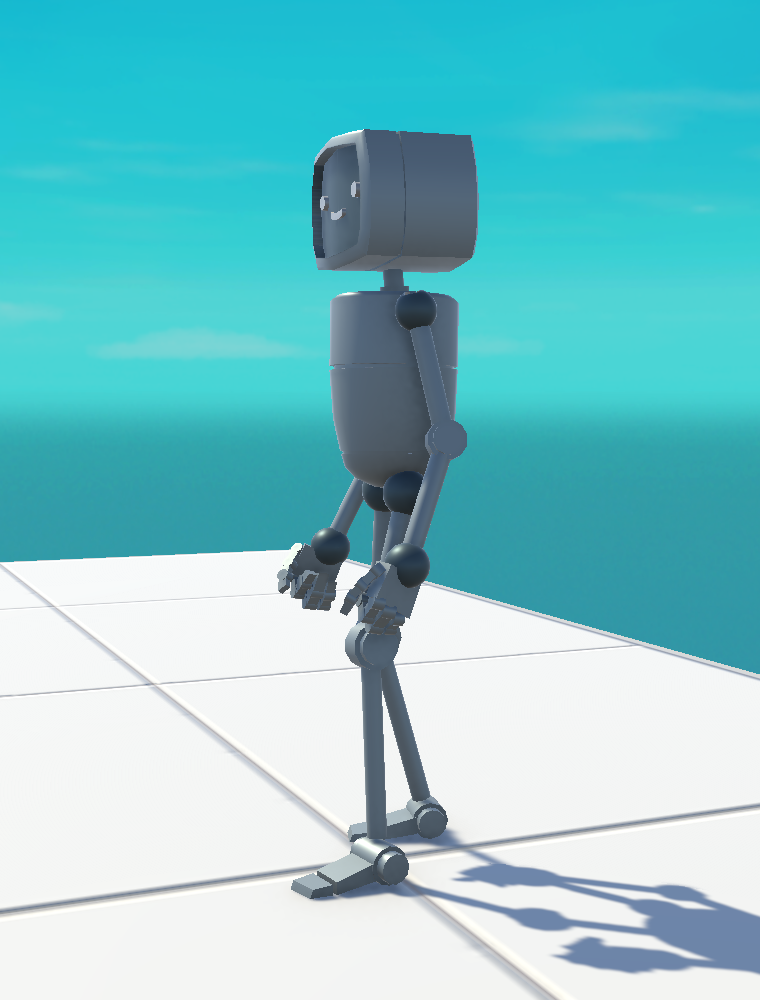
Default state
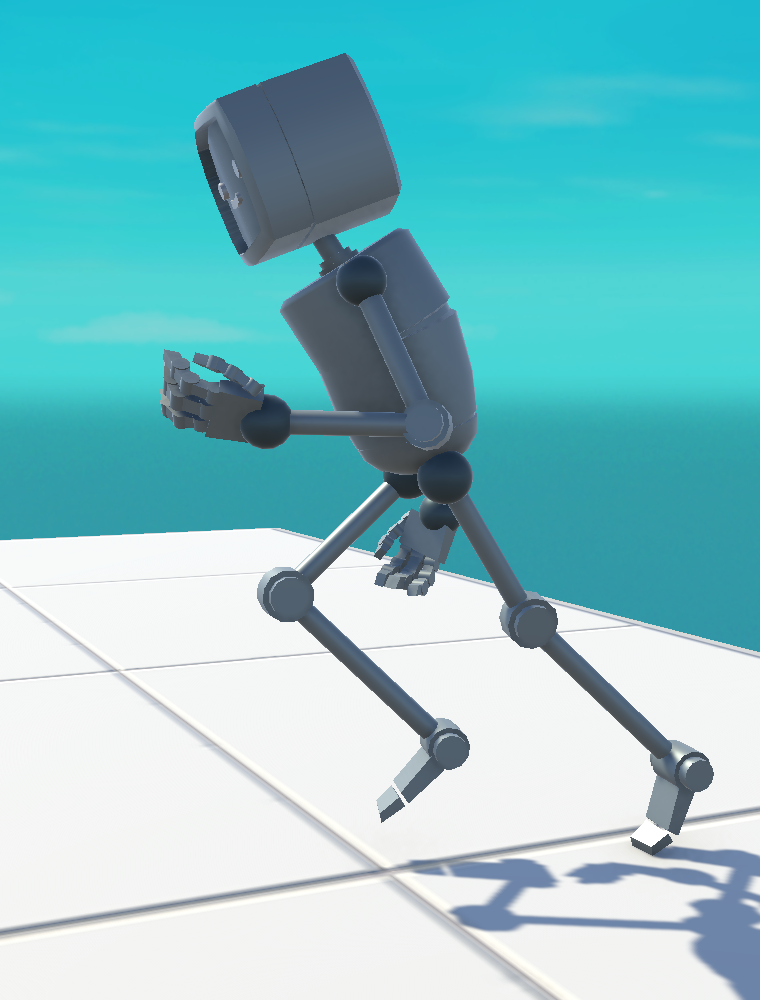
Speed > 0
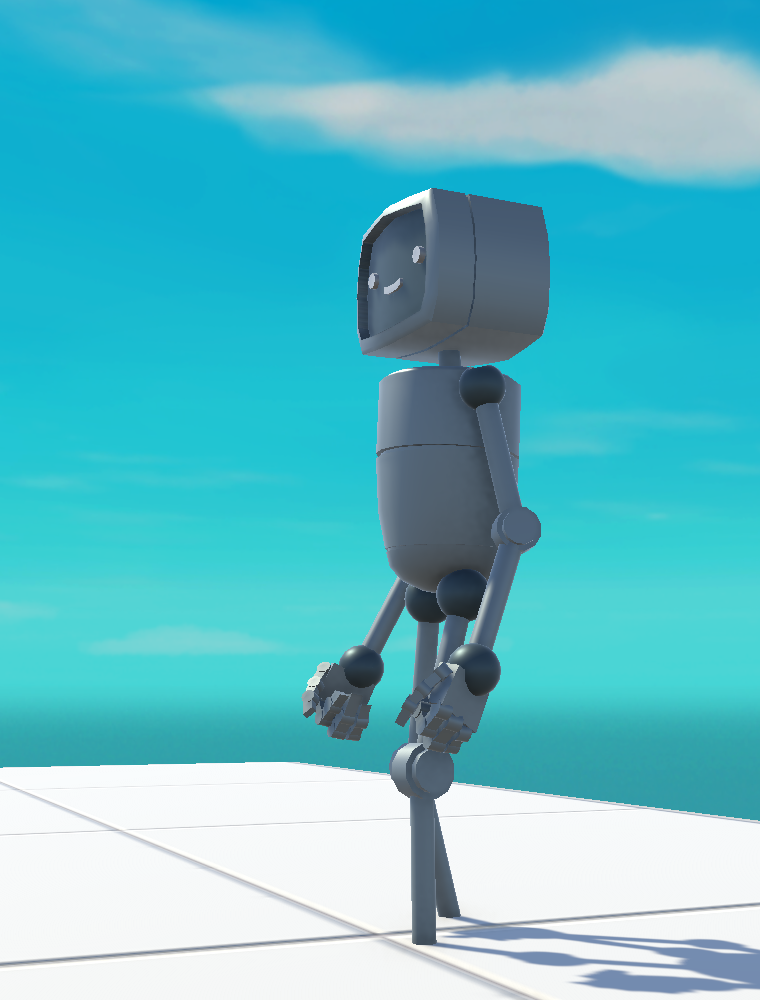
Trigger
Same GameObject, same Animator — three different states. The interesting question is: what makes Unity switch from one to the next? That's what the rest of this lesson answers.
📖 Definition
State machine: a set of states plus the rules for moving between them. At any moment the machine is in exactly one state; transitions carry it to the next. Unity's Animator is a visual state machine you build by dragging boxes and arrows.
Reading the Animator Window
Open Window ▸ Animation ▸ Animator (or double-click an Animator Controller). You'll see a dark grid canvas holding boxes and arrows, with a Parameters panel on the left. Here is the state machine we're about to build, drawn exactly as the Animator window lays it out:
💡 Why a diagram and not a screenshot? Unity's node-editor windows (the Animator, Shader Graph, Timeline) are drawn with a technology that can't be captured cleanly as an image. Throughout this course those windows are rebuilt as precise diagrams from the real setups — every node, colour, and label matches what you'll see on screen. All in-game renders (like the three states above) are genuine Unity captures.
Creating States
Every clip you drop into the Animator becomes a state. There are three easy ways to add one:
- Drag a clip from the Project window straight onto the Animator canvas — it becomes a state with that clip as its motion.
- Right-click the canvas ▸ Create State ▸ Empty, then assign a clip in the Inspector's Motion field.
- Right-click ▸ Create State ▸ From New Blend Tree (we'll use this in Lesson 1.3).
The first state you add is automatically the default state — shown in orange and wired from the green Entry node. It's whatever the character does the instant the game starts, so it's almost always Idle. To change which state is the default, right-click any state ▸ Set as Layer Default State.
✅ Pro Tip
Name your states clearly (Idle, Run, Jump) — not after the clip file. You'll reference these names in code later, and "Run" reads far better than "Locomotion--Run_N_v2_final".
Parameters: The Switches
A state machine needs inputs to decide when to switch. Those inputs are parameters — named values you add in the Parameters panel and change from your game code. There are four kinds:
- Float — a decimal number, e.g.
Speed. Great for "how fast am I moving?" - Int — a whole number, e.g. a
WeaponTypeindex. - Bool — true/false, e.g.
Grounded. Stays set until you change it. - Trigger — a special bool that flips itself back to false the moment it's consumed by a transition. Perfect for one-shot events like
JumporAttack.
In Figure 1, the panel holds a Speed float, a Jump trigger, and a Grounded bool. Your code sets these; the transitions read them.
⚠️ Trigger vs. Bool — the classic mix-up
Use a Trigger for momentary actions (jump, attack, take damage) — it auto-resets so the action fires once. Use a Bool for ongoing conditions (is grounded, is crouching) that stay true until something changes them. Using a Bool where you meant a Trigger causes the classic "my character jumps forever" bug.
Transitions & Conditions
A transition is the arrow from one state to another. To create one, right-click a state ▸ Make Transition, then click the target state. Select the arrow and the Inspector shows its Conditions — the parameter tests that must all be true for the transition to fire.
In our machine:
- Idle → Run fires when
Speed > 0.1(the player started moving). - Run → Idle fires when
Speed < 0.1(the player stopped). - Any State → Jump fires when the
Jumptrigger is set — from any state, so you can jump whether idling or running.
The teal Any State node is a shortcut: an arrow from it means "this transition can happen no matter which state we're currently in." It saves you drawing a Jump arrow out of every single state.
Conceptually, every frame the Animator asks a simple question:
parameters each frame"] --> B{"Does any transition's
condition pass?"} B -- "Yes" --> C["Switch to the
target state"] B -- "No" --> D["Keep playing the
current state"] C --> E["Blend over
Transition Duration"]
Figure 2: The Animator re-evaluates transitions every frame based on the current parameter values.
Has Exit Time
Not every transition waits on a condition. Select a transition and you'll see a Has Exit Time checkbox. When it's ticked, the transition fires automatically once the current clip reaches a certain point — no parameter needed.
- Condition-driven (Has Exit Time off): switch the instant the condition is met. Use for responsive controls — Idle→Run should happen immediately when the player moves.
- Exit-time-driven (Has Exit Time on): let the clip finish, then switch. Use for one-shot animations — our Jump → Idle transition waits for the jump/land animation to play out before returning to Idle.
📖 Definition
Transition Duration: how long Unity blends between the two states as it switches (set on the transition, shown as the little overlap in its timeline). A short duration (0.1–0.25s) smooths the change so limbs don't snap. Set it to 0 for an instant cut.
Driving It from Code
The Animator won't change parameters by itself — your gameplay script does, by grabbing the Animator component and calling SetFloat, SetBool, or SetTrigger. Here's a minimal driver that feeds our three parameters:
using UnityEngine;

public class CharacterAnimDriver : MonoBehaviour
{
    Animator animator;

    void Awake()
    {
        animator = GetComponent<Animator>();
    }

    void Update()
    {
        // however you read movement — this is just an example magnitude
        float speed = new Vector2(moveX, moveZ).magnitude;

        animator.SetFloat("Speed", speed);      // drives Idle <-> Run
        animator.SetBool("Grounded", isGrounded);

        if (jumpPressed)
            animator.SetTrigger("Jump");         // fires Any State -> Jump once
    }
}
Notice the parameter names in quotes must match the Parameters panel exactly — they're the contract between your code and the state machine. Set a float continuously, set a bool when its condition changes, and trigger a one-shot action.
⚠️ Strings are fragile
Misspell "Speed" and you get no error — just a character that never runs. In production, cache the parameter as a hash with Animator.StringToHash("Speed") once and reuse it; it's faster and easier to spot. We'll use that pattern in the Module 1 mini-project.
A Peek at the Real Thing
Timmy's actual controller in our project is a little more advanced than Figure 1: instead of separate Idle and Run states, it uses a single blend tree that smoothly mixes Idle, Walk, and Run based on the exact Speed value — which is why the run render above shows a natural lean rather than an on/off switch. That's the subject of the next lesson.
🔎 Look for yourself: openAssets ▸ …ThirdPersonController ▸ Character ▸ Animations ▸ StarterAssetsThirdPerson.controllerin the Animator window. You'll spot the sameSpeed,Jump,Grounded, andFreeFallparameters driving states named Idle Walk Run Blend, JumpStart, InAir, and JumpLand.
Hands-on Challenge
🏋️ Exercise 1: Build the Idle ⇄ Run machine
Objective: Recreate the core of Figure 1 yourself.
- Create an Animator Controller and add an
Idlestate (set it as default) and aRunstate. - Add a Float parameter named
Speed. - Make a transition Idle → Run with condition
Speed > 0.1, Has Exit Time off. - Make a transition Run → Idle with condition
Speed < 0.1, Has Exit Time off. - Press Play and, in the Animator window, drag the
Speedvalue up and down — watch the active state (the one with the blue progress bar) switch.
💡 Hint: nothing switches when I change Speed
Check that Has Exit Time is unticked on both transitions, and that the condition uses the right comparison (Greater / Less). If a transition has no condition and no exit time, it fires instantly and loops.
✅ Success check
With Speed at 0 the machine rests in Idle; push it above 0.1 and it moves to Run and stays there; drop it below 0.1 and it returns to Idle — all without touching Play/Stop.
🏋️ Exercise 2: Add a jump
Add a Jump Trigger parameter and a Jump state. Draw a transition from Any State → Jump conditioned on the trigger, and a Jump → Idle transition with Has Exit Time on. Attach the CharacterAnimDriver script and confirm a single button press plays the jump exactly once — proof your Trigger resets itself.
🎯 Quick Quiz
Question 1: Which parameter type should drive a one-shot "Attack" animation?
Question 2: You want Run → Idle to happen the instant the player stops. What should Has Exit Time be?
Question 3: What does the teal Any State node let you do?
Summary
🎉 Key Takeaways
- A state is the animation playing right now; the state machine holds all states and the rules between them.
- The first state added is the default (orange, wired from Entry) — usually Idle.
- Parameters (Float, Int, Bool, Trigger) are the switches your code sets; transitions read them through conditions.
- Use a Trigger for one-shot actions and Any State for transitions that can fire from anywhere.
- Has Exit Time off = respond to conditions immediately; on = let the clip finish first.
- From code:
SetFloat,SetBool,SetTrigger— parameter names must match exactly.
🚀 What's Next?
Our Idle and Run were separate states with a hard switch between them. Real locomotion feels smoother because it blends — walking eases into jogging eases into a sprint as speed rises. In Lesson 1.3: Blend Trees we replace the Idle/Run pair with a single blend tree driven by that same Speed float.
🎬 You can read a state machine now
Boxes are states, arrows are transitions, conditions are the rules, parameters are the switches. That vocabulary carries through every Animator you'll ever open.