✨ Lesson 9.1: Particle Systems (Shuriken)
Fire, smoke, sparks, dust, magic — almost every "juicy" effect in a game is a swarm of tiny textured quads managed by a Particle System. Unity's built-in one is nicknamed Shuriken, and it is a stack of toggleable modules you configure entirely in the Inspector. In this lesson you'll learn to read that stack, spawn particles by rate and in bursts, shape and color them over their lives, and fire an effect from a script.
🎯 Learning Objectives
By the end of this lesson, you will be able to:
- Add a Particle System component and read its module stack in the Inspector
- Configure the Main module (lifetime, speed, size, color, looping)
- Emit particles by rate over time versus one-shot bursts
- Use the Shape module to aim emission, and the over-lifetime modules to fade and shrink
- Build a spark burst and a rising smoke plume from scratch
- Play, stop, and emit particles from C# via the
ParticleSystemAPI
Estimated Time: 40 minutes · Prerequisite: Lesson 8.4 (Building a Dissolve Shader) and comfort adding components in the Inspector
In This Lesson
What Shuriken Is
A Particle System is a component that spawns, moves, and eventually kills a crowd of small billboards (usually flat quads that always face the camera). You don't animate each speck; you set rules — "spawn 50 per second, send them upward at 2 m/s, fade them from white to transparent over 1.5 seconds" — and Unity simulates the rest.
Add one with GameObject ▸ Effects ▸ Particle System, or click Add Component ▸ Effects ▸ Particle System on any GameObject. The moment it exists, a default fountain of white puffs starts playing in the Scene view, and a small Particle Effect playback panel appears in the bottom-right of that view with Play / Pause / Restart / Stop and a scrubbable timeline.
📖 Definition
Shuriken: the informal name for Unity's built-in, CPU-simulated Particle System component. It is a single component whose behaviour is split across a dozen-plus modules — foldout sections you enable and tune independently. (The newer, GPU-driven VFX Graph is a separate system; that's the next lesson.)
Reading the Module Stack
Select the GameObject and the Inspector shows the Particle System as a tall stack of modules. Each module is a collapsible foldout with a checkbox on its left: unchecked means that behaviour is off. The very top module — the one that shares the component's name and has no checkbox — is the Main module and is always active. Below it come Emission, Shape, and a long list of optional modifiers, ending in the Renderer module that decides how each particle is drawn.
💡 One component, many modules. Beginners often hunt for the setting that controls, say, particle color and get overwhelmed. The trick is knowing which module owns it: initial color lives in Main ▸ Start Color, but a color that changes as the particle ages lives in the separate Color over Lifetime module. Learn the map and the stack stops being scary.
The Main Module
The Main module sets the starting properties every particle is born with, plus system-wide settings. The fields you'll reach for constantly:
- Duration — how long the system emits before the cycle ends (in seconds).
- Looping — restart the cycle forever. On for fire and smoke; off for a one-shot explosion.
- Start Lifetime — how many seconds each particle lives before it dies.
- Start Speed — the initial velocity, fired along the direction the Shape module chooses.
- Start Size and Start Rotation — the birth size and spin of each quad.
- Start Color — the birth tint (multiplied with the particle texture).
- Gravity Modifier — how strongly Unity's gravity pulls particles. 0 = weightless smoke; a small positive value = falling sparks.
- Max Particles — a hard cap so a runaway system never spawns a million quads.
✅ Pro Tip: those little curve/dice buttons
Many fields (Start Speed, Start Size, Lifetime…) have a tiny triangle on the right. Click it to switch from a Constant to Random Between Two Constants, a Curve, or Random Between Two Curves. "Random Between Two Constants" is the single most useful one — a spark burst with lifetimes between 0.3 and 0.8s looks far more natural than every spark dying at the exact same instant.
Emission: Rate vs. Bursts
The Emission module answers "how many particles, and when?" It offers two mechanisms, and you can use them together:
- Rate over Time — a steady stream: N particles per second, continuously. This is how you make fire, smoke, a torch, or a dust cloud — anything that emits the whole time it's on.
- Rate over Distance — emit per metre the object moves. Perfect for tyre dust or a jet trail that only puffs while the emitter is actually travelling.
- Bursts — spawn a lump of particles all at once at a specific time. Add a burst row and set its Count (e.g. 40). This is how you make an explosion, a coin-collect pop, or a footstep splash: one instant, a fixed number, done.
A grenade explosion is a classic combo: a single burst of 60 debris sparks at time 0, with Rate over Time set to 0 so nothing dribbles out afterward.
⚠️ Looping + Burst = repeating explosions
If you build a one-shot explosion but leave Looping ticked in the Main module, your burst fires again every Duration seconds forever. For a true one-shot, turn Looping off. If you also want it to clean itself up, enable Stop Action ▸ Destroy in the Main module so the GameObject removes itself once all particles have died.
The Shape Module
The Shape module defines the volume particles spawn inside and the direction they're launched. Pick a shape from the dropdown:
- Cone — the default. Particles fire outward within an angle. Great for flamethrowers, fountains, and muzzle flashes. The Angle controls the spread; Radius the size of the base.
- Sphere / Hemisphere — emit in all directions (or the top half). Ideal for an omnidirectional explosion or a glowing aura.
- Box — fill a rectangular volume. Good for rain, snow, or falling ash across an area.
- Circle and Edge — flat emitters for shockwave rings and ground effects.
- Mesh — spawn from the surface of any mesh, so a character can dissolve into particles that match their silhouette.
A narrow Cone pointed up gives you a tight torch flame; widen the Angle and you get a spreading fountain. Disable the Shape module entirely and all particles spawn from a single point.
Color & Size Over Lifetime
Birth values from the Main module rarely look finished on their own — real effects change as particles age. Two modules do most of that work:
- Color over Lifetime — a gradient evaluated from birth (left) to death (right). The gradient's alpha track is the secret to good VFX: fading alpha to 0 on the right edge makes smoke and sparks dissolve gracefully instead of popping out of existence.
- Size over Lifetime — a curve from 0 to 1 (fraction of Start Size) across the particle's life. Smoke grows as it rises (curve ramps up); sparks shrink as they cool (curve ramps down).
Here's how the two combine to turn a plain white dot into believable smoke:
Start Color: light grey
Start Size: small"] --> B["Mid-life
Size curve ramps up
alpha still high"] B --> C["Death
Size largest
Color-over-Lifetime
alpha to 0"]
Figure 2: A smoke particle grows and fades over its lifetime — the Main module sets birth values; the over-lifetime modules animate the rest.
💡 Other over-lifetime modules. The same pattern repeats: Velocity over Lifetime (drift and swirl), Rotation over Lifetime (spin), and Force over Lifetime (wind). Each is a curve applied across the particle's life. Enable only the ones the effect needs — every active module costs CPU.
Two Effects: Sparks & Smoke
Let's turn the theory into two recipes you can build in minutes.
⚡ A spark burst
- Main: Looping off, Start Lifetime Random Between 0.3 and 0.7, Start Speed 5–9, Start Size 0.05, Start Color a hot orange, Gravity Modifier 0.4 so sparks arc back down.
- Emission: Rate over Time 0, plus one Burst of Count 40 at time 0.
- Shape: Cone, Angle 25, pointed away from the surface.
- Color over Lifetime: orange → dark red with alpha fading to 0 at the end.
- Size over Lifetime: a downward curve so each spark thins as it cools.
- Renderer: a small additive spark material so overlaps glow brighter.
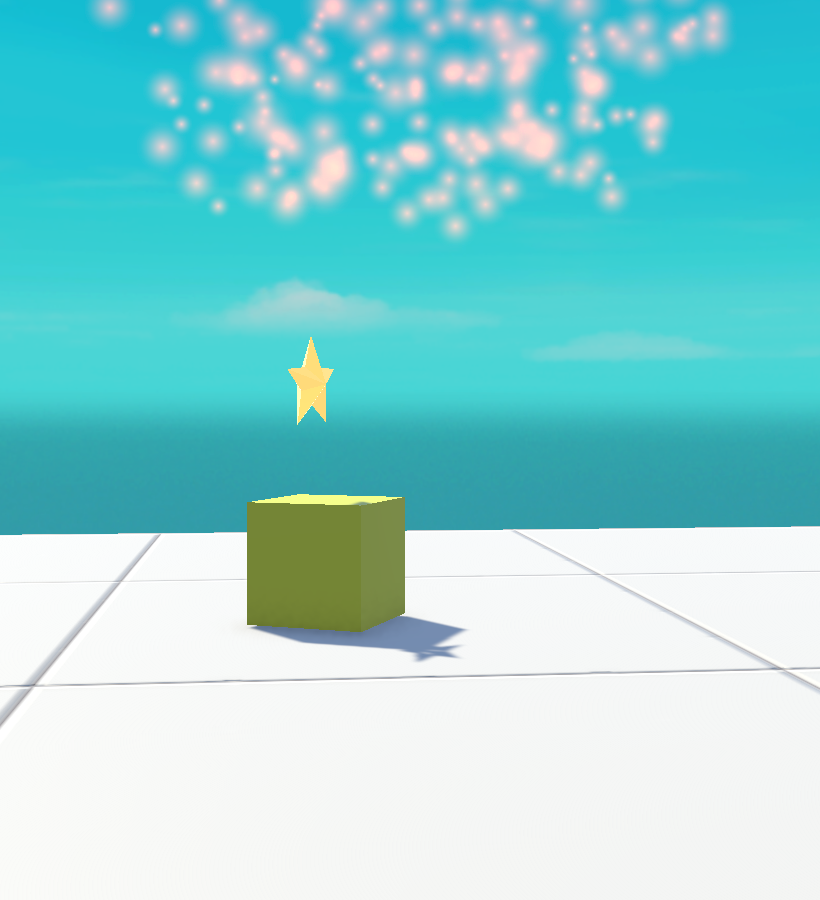
💨 A rising smoke plume
- Main: Looping on, Start Lifetime 2–3, Start Speed 0.6, Start Size 0.5, Start Color a soft grey, Gravity Modifier 0.
- Emission: Rate over Time 12 for a continuous column.
- Shape: Cone, small Angle, pointing up.
- Color over Lifetime: alpha rises quickly then fades to 0 so puffs appear and dissolve softly.
- Size over Lifetime: an upward curve so the smoke billows wider as it climbs.
- Renderer: a soft, semi-transparent smoke texture (alpha-blended, not additive).
✅ Pro Tip: additive vs. alpha-blended
The Renderer ▸ Material decides the "feel." Additive materials add light where particles overlap — use them for fire, sparks, magic, and anything glowing. Alpha-blended materials just layer transparency — use them for smoke, dust, and fog. Picking the wrong blend mode is the number-one reason a first effect looks flat.
Playing It from Code
You rarely leave an explosion looping forever in the scene — you spawn it or trigger it at the right moment from a script. Grab the ParticleSystem component and drive it:
using UnityEngine;

[RequireComponent(typeof(ParticleSystem))]
public class SparkBurst : MonoBehaviour
{
    ParticleSystem ps;

    void Awake()
    {
        ps = GetComponent<ParticleSystem>();
    }

    // Call this the moment something is hit.
    public void Fire()
    {
        ps.Play();          // start the system (fires its bursts)
    }

    // Spawn an exact number on demand, ignoring the Emission module.
    public void FireExtra(int count)
    {
        ps.Emit(count);
    }

    public void StopEmitting()
    {
        // stop spawning new particles, but let existing ones finish
        ps.Stop(true, ParticleSystemStopBehavior.StopEmitting);
    }
}
The three calls you'll use most are Play(), Stop(), and Emit(count). Note that many properties are read-only at runtime unless you go through a module struct — for example, to change the emission rate in code you assign through ps.emission:
void SetRate(float perSecond)
{
    // Modules are structs: grab it, change it. The system reads it live.
    var emission = ps.emission;
    emission.rateOverTime = perSecond;
}
⚠️ "Play On Awake" fights your code
By default the Main module has Play On Awake ticked, so the system starts the instant it loads. If you plan to trigger it from a script (an explosion on impact, say), untick Play On Awake — otherwise the effect plays once at spawn before your Fire() ever runs.
Hands-on Challenge
🏋️ Exercise 1: A one-shot coin-pop
Objective: Build a burst effect that plays exactly once when triggered.
- Create a Particle System. In Main: turn Looping and Play On Awake off, set Start Lifetime to Random Between 0.4 and 0.8, Start Speed to 3–6.
- In Emission: set Rate over Time to 0 and add a Burst of Count 25 at time 0.
- Set the Shape to a Sphere so coins fly out in all directions.
- Enable Color over Lifetime and fade the gradient's alpha to 0 at the end.
- Attach the
SparkBurstscript and callFire()from a test key press or a trigger collider.
💡 Hint: it plays once at start and never again
That's Play On Awake still ticked in the Main module. Untick it so the only thing that starts the system is your ps.Play() call.
✅ Success check
Nothing emits when you enter Play mode. Each time you call Fire(), exactly 25 particles burst outward, fade, and disappear — with no lingering stream between triggers.
🏋️ Exercise 2: A looping torch flame
Build a continuous fire using Rate over Time (around 20/s), a narrow upward Cone, an additive flame material in the Renderer, and a Color over Lifetime gradient that goes yellow → orange → red with alpha fading out. Add a Size over Lifetime curve that shrinks each flame lick as it rises. Leave Looping and Play On Awake on so it burns as soon as the scene runs.
🎯 Quick Quiz
Question 1: You want a single explosion that spawns 50 particles all at once and never repeats. Which combination is correct?
Question 2: Which module makes a particle fade out gracefully instead of popping away at the end of its life?
Question 3: You wrote a script to trigger an effect on impact, but it always plays once the instant the object spawns. What's the fix?
Summary
🎉 Key Takeaways
- The Particle System (Shuriken) is one component built from a stack of modules you enable and tune independently.
- The Main module (always on) sets birth values: lifetime, speed, size, color, gravity, looping.
- Emission spawns by Rate over Time (streams like fire/smoke) or Bursts (one-shot explosions).
- The Shape module chooses the emission volume and direction — Cone, Sphere, Box, Mesh, and more.
- Color and Size over Lifetime animate particles as they age; fading alpha to 0 is what sells the effect.
- The Renderer material (additive vs. alpha-blended) sets the whole look; drive it all from code with
Play(),Stop(), andEmit().
🚀 What's Next?
Shuriken runs on the CPU, which is perfect for hundreds of particles — a torch, some sparks, a dust puff. But when you need hundreds of thousands (a swirling galaxy, a blizzard, a magical vortex), the CPU can't keep up. In Lesson 9.2: The VFX Graph we move the simulation onto the GPU and build effects in a node-based graph that can push millions of particles.
✨ You can build effects now
Main sets the birth, Emission sets the how-many, Shape sets the where, over-lifetime modules animate the aging, and the Renderer sets the look. That mental map unlocks every particle effect you'll ever build.